Model a 3D Terrain Site from Google Earth without Contour Maps . . . In under a minute!
Create 3D models of terrain, contours and topography using accurate data from Google Earth using Sketchup and Rhino. THE MOST UNDERRATED SITE MODELLING TOOL EVER.
In this Sketchup and Rhino tutorial, you’ll learn how to model a 3D site in less than 60 seconds.
It involves geo-locating a site from Google Earth in Sketchup, and then transferring that model to Rhinoceros 3D to create a NURBS surface 3D model of the chosen site.
This is something I’ve only just discovered after spending 2 hours+ modelling a site from referencing a contour map – and thought – surely there’s a better way to do this.
Sure enough, Sketchup and Rhino have a solution.
I hope you find this helpful!
I hope you enjoy the video! Feel free to discuss anything in the comments below. I respond to every comment 🙂
Hang with us on the podcast: http://successfularchistudent.com/category/the-successful-archi-students-podcast/
Join the community! http://successfularchistudent.com/community/
3D SITE MODEL IN UNDER 60 SECONDS
How do I quickly create a 3D site model of my terrain, contours or topography?


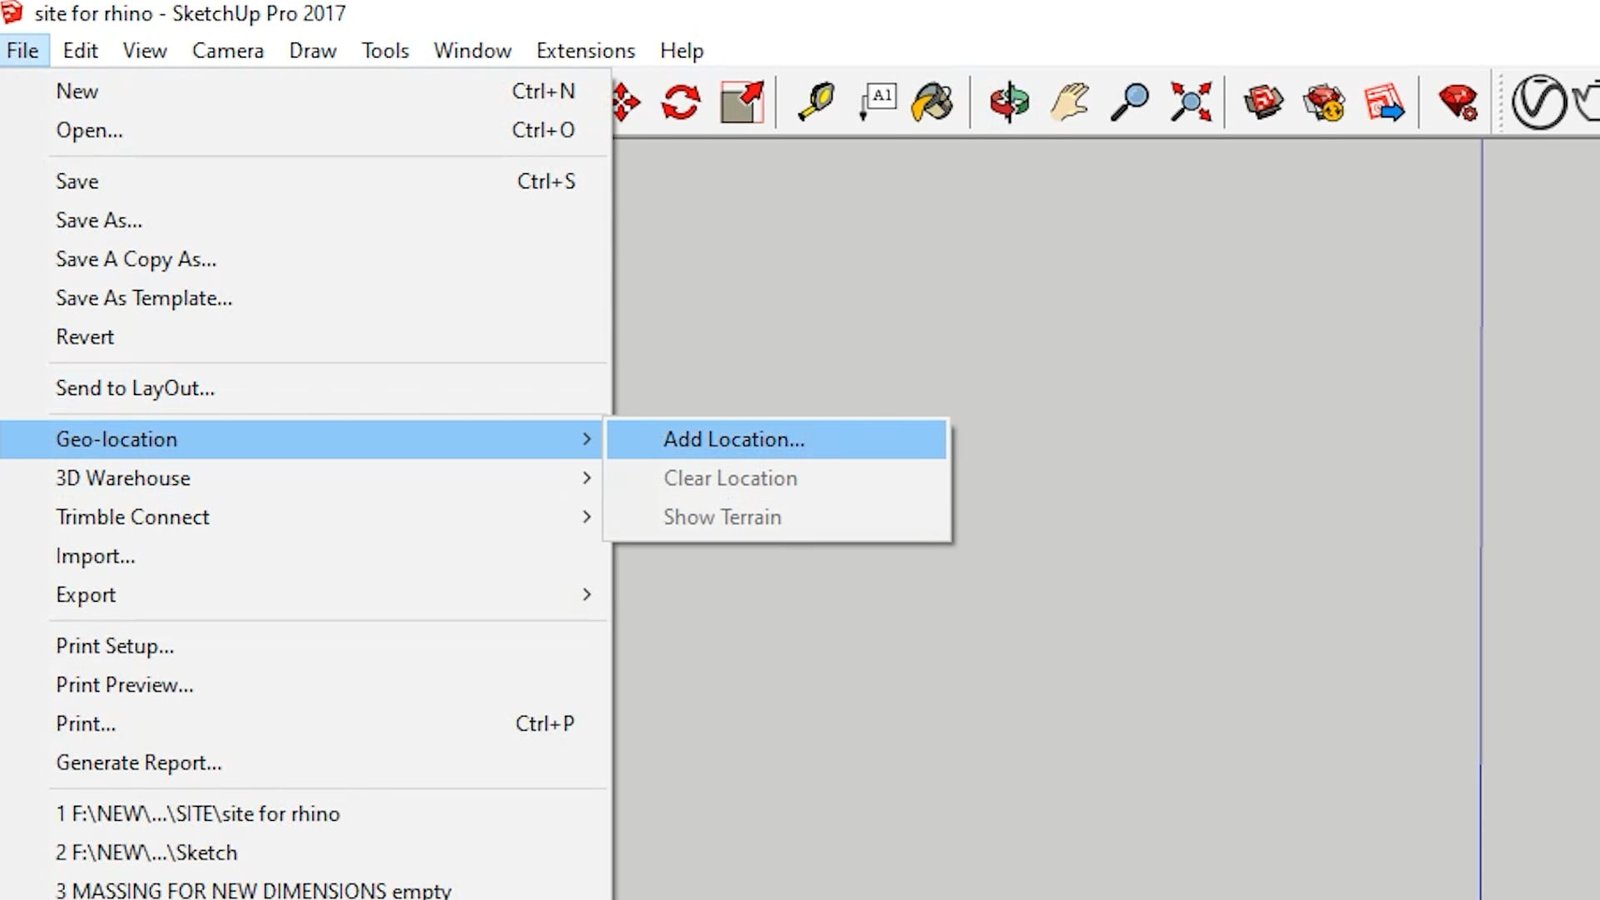
Firstly, open up Sketchup. You want to start off by adding a Geo-Located region of the site terrain you want modeled.
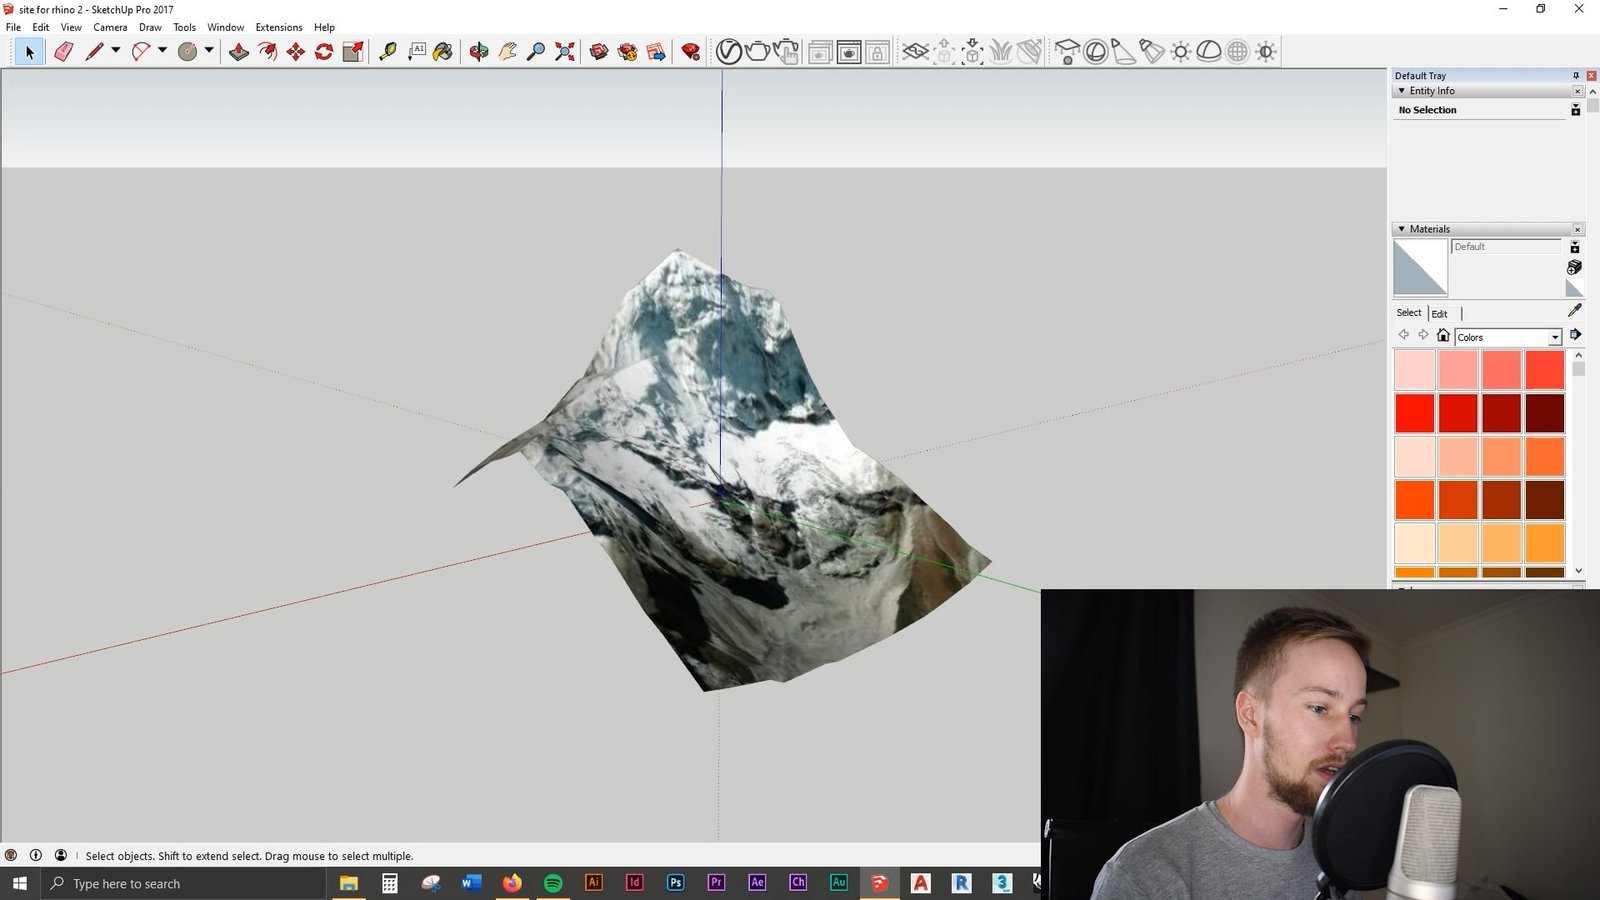
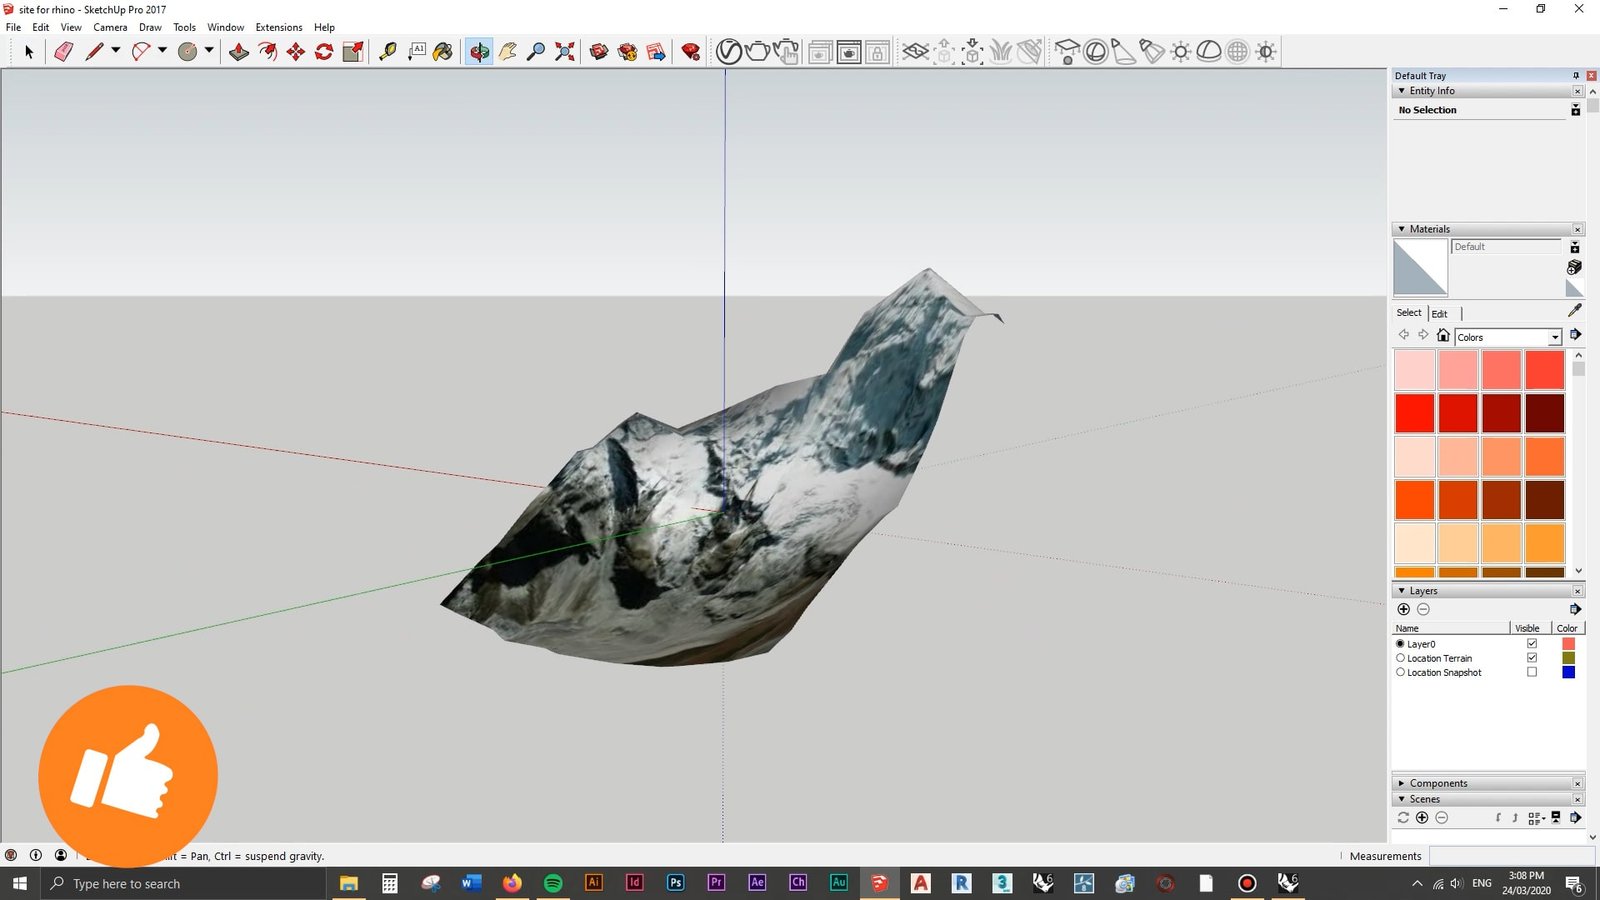
In this case, I start by adding some mountains in Nepal.
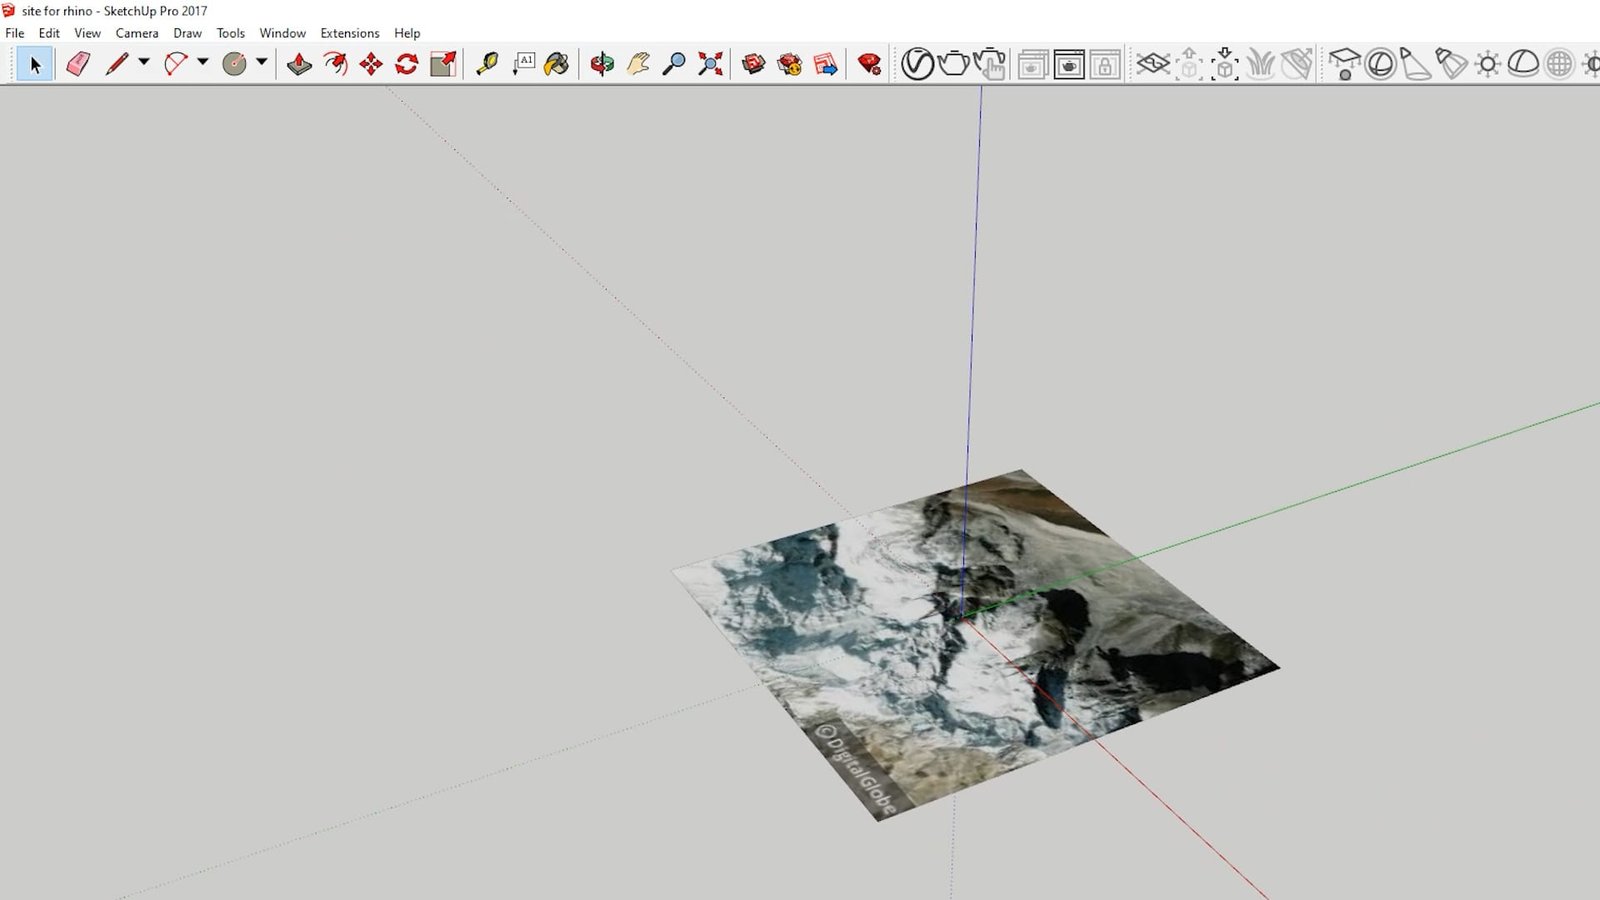
Next, Define the region of your site terrain that you want modeled and insert it into your file.

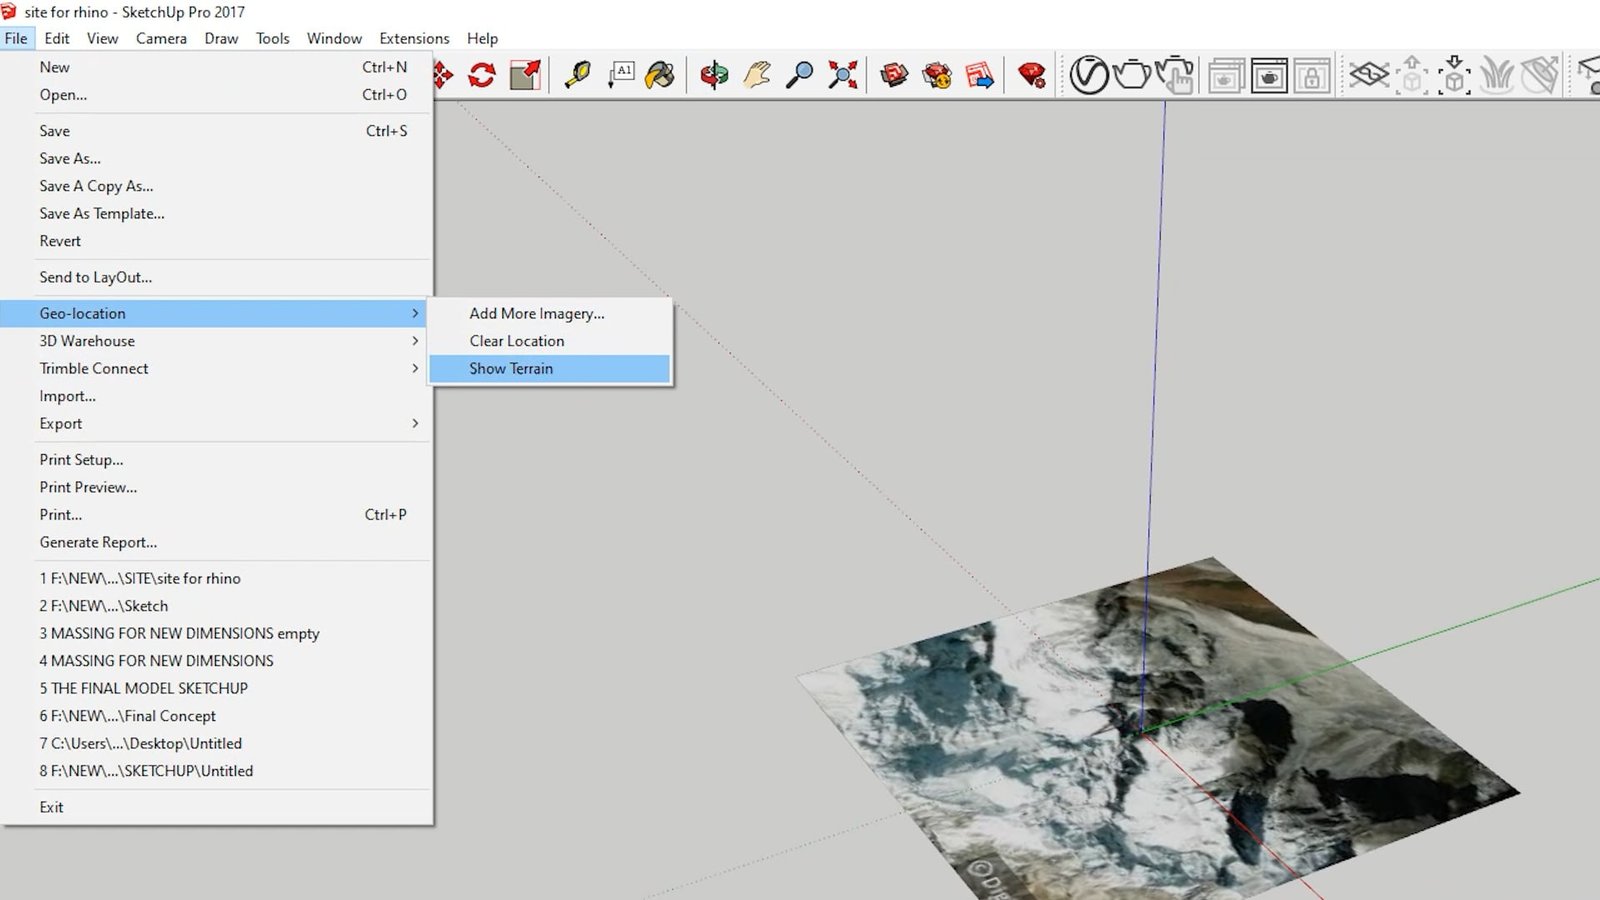
To show the terrain, Go to “File” -> “Geo-Location” -> “Show Terrain”.
This will model the flat site up into a terrain model by referring to the accurate data provided by Google Earth.
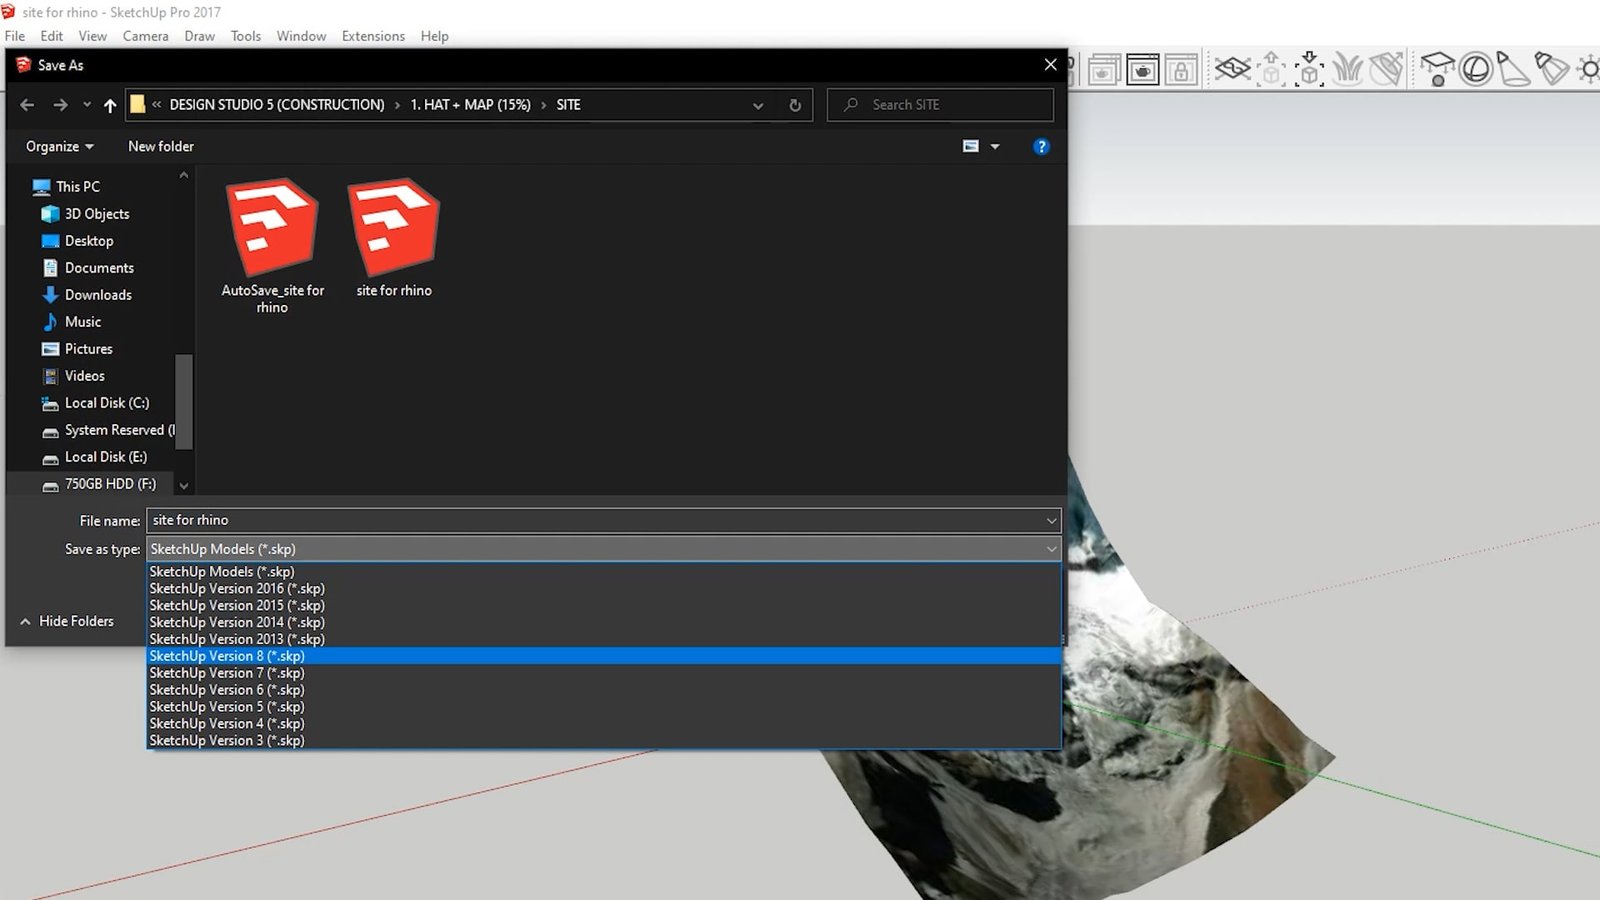
Once you are happy with how your site terrain model looks, the next step is to save your Sketchup model, ready to import into Rhino..
You can do this by going “File” -> “Save As (Sketchup Version 8)“
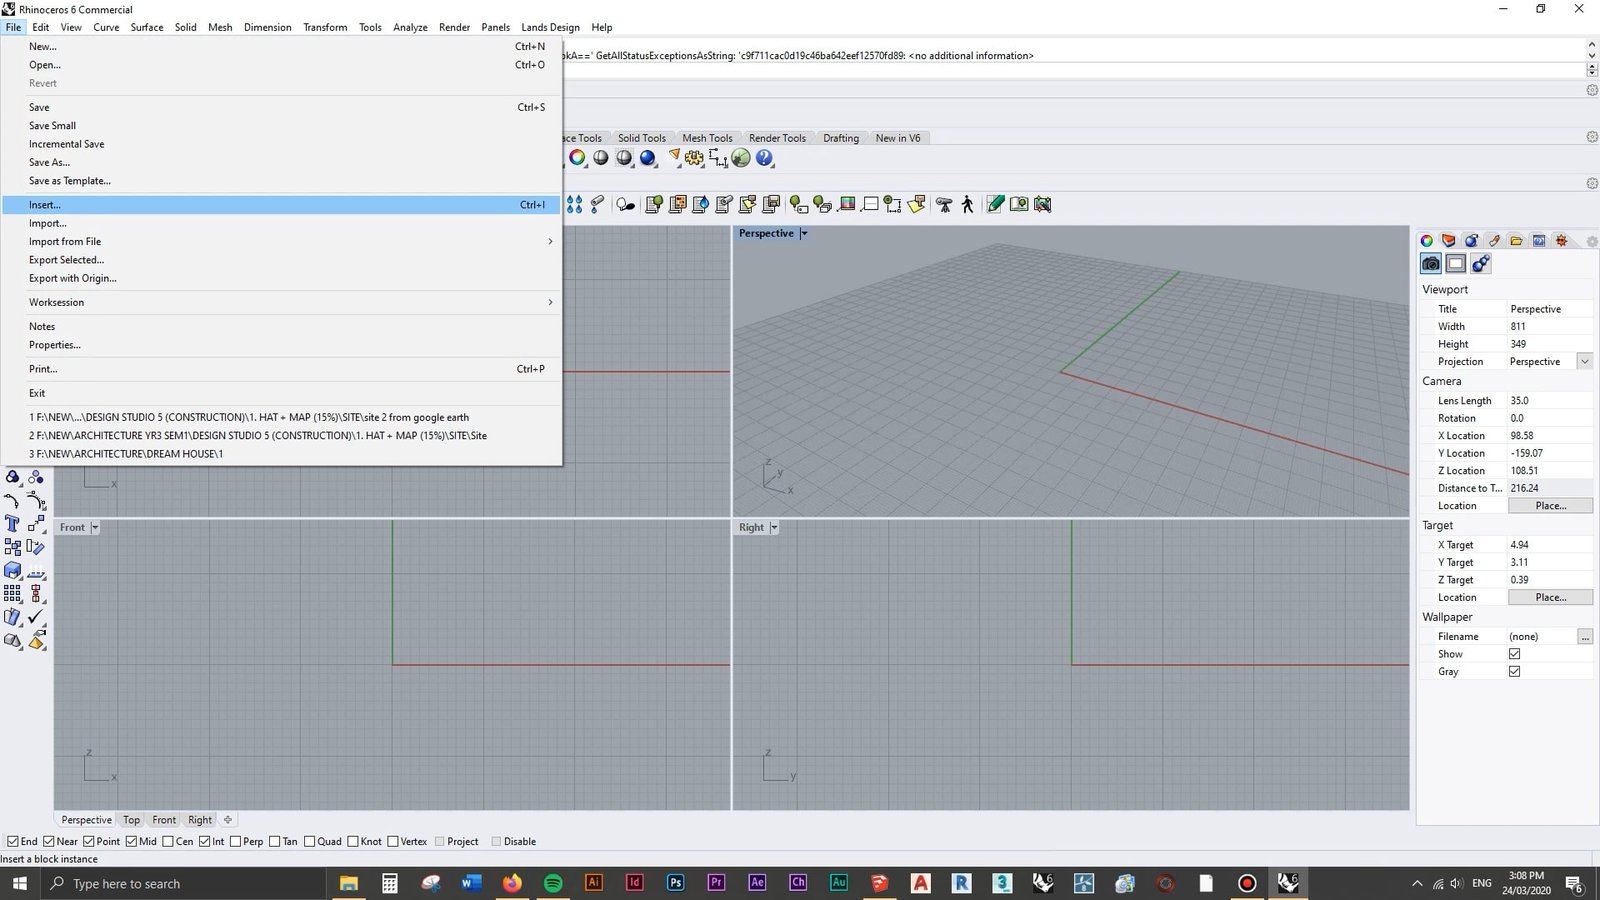
From here, open Rhinoceros 3D and import your Sketchup model of the site terrain you just created using Google Earth.
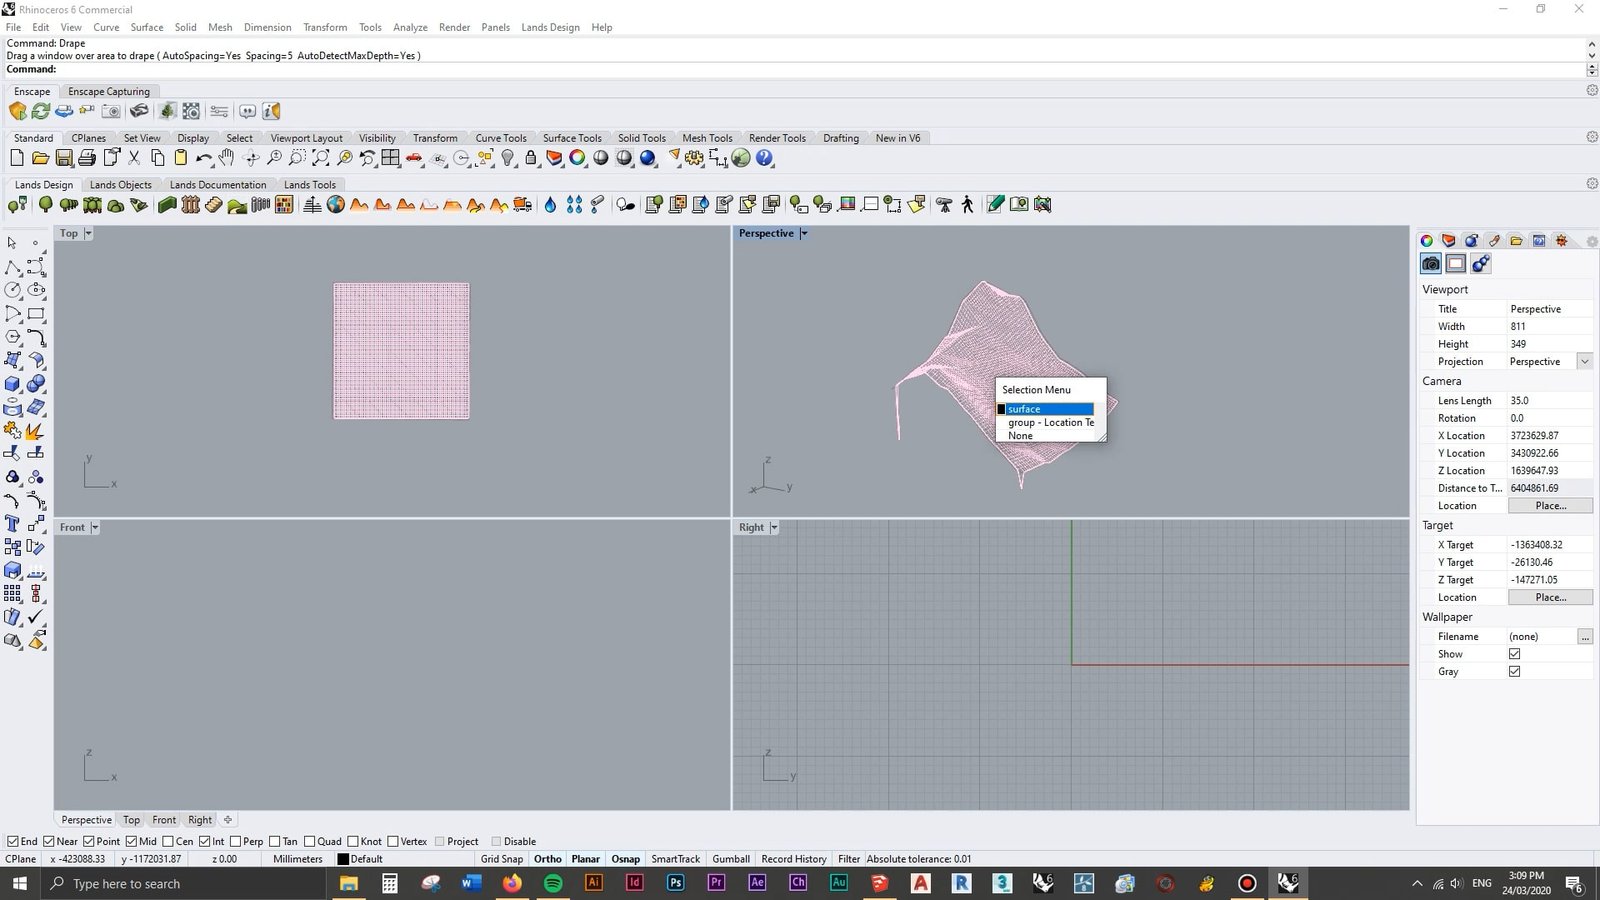
We can now create a NURBS surface of the model, compatible with Rhino.
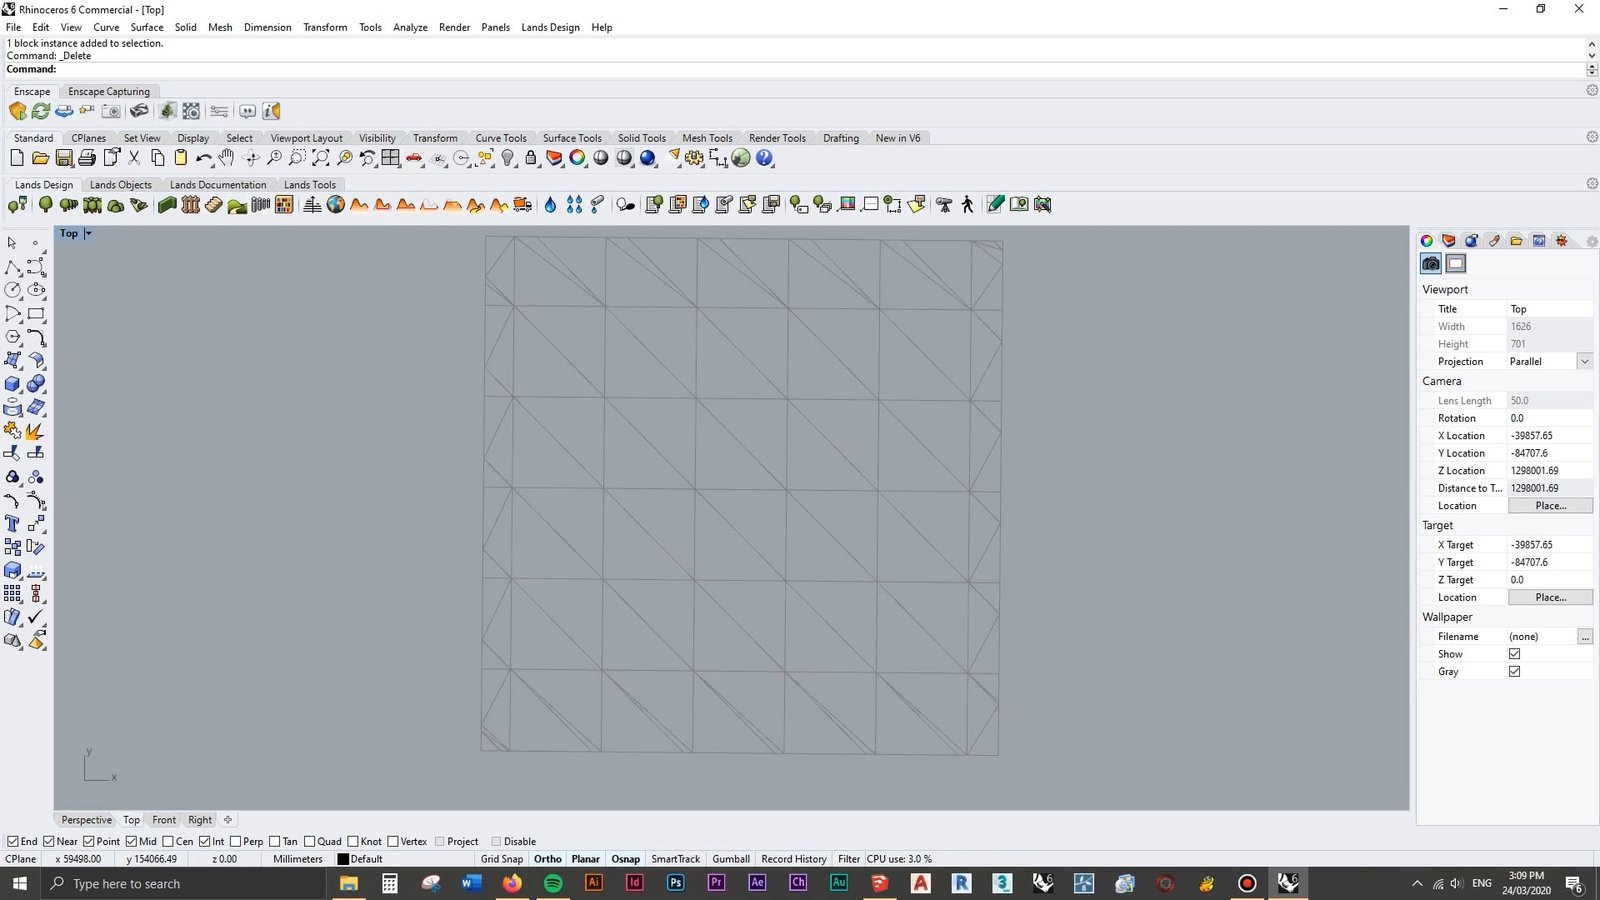
In the top viewport, type “Drape” and draw a window over the area to drape.

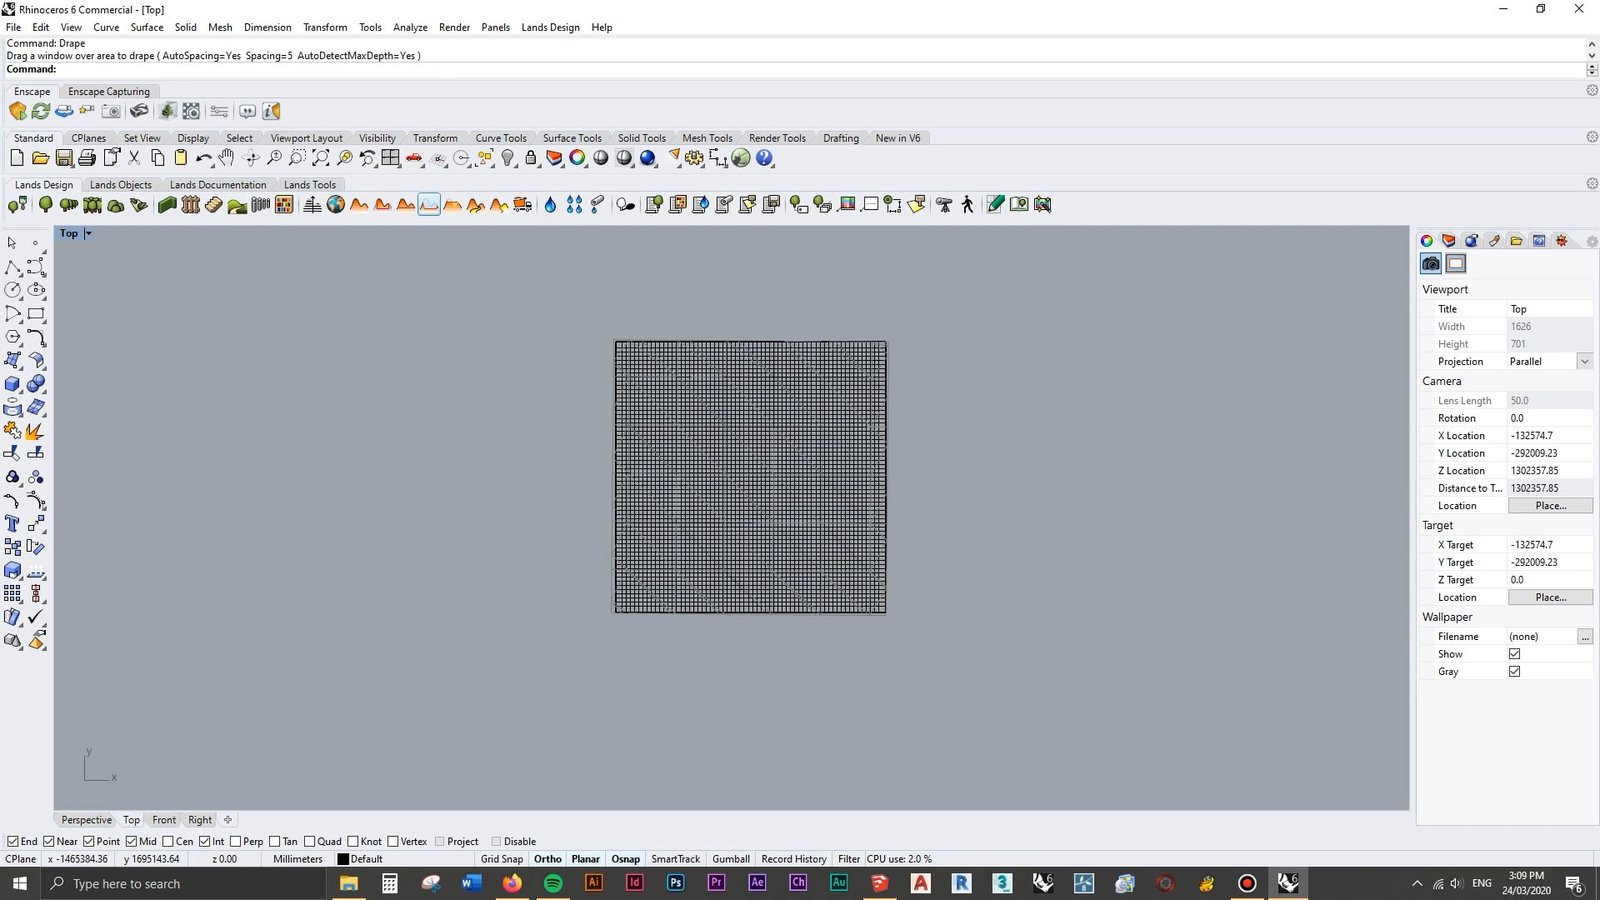
You can now delete the group underneath and keep your new, NURBS surface site model terrain.
There you have it! A nice, seamless model of your site terrain, done in under 60 seconds.
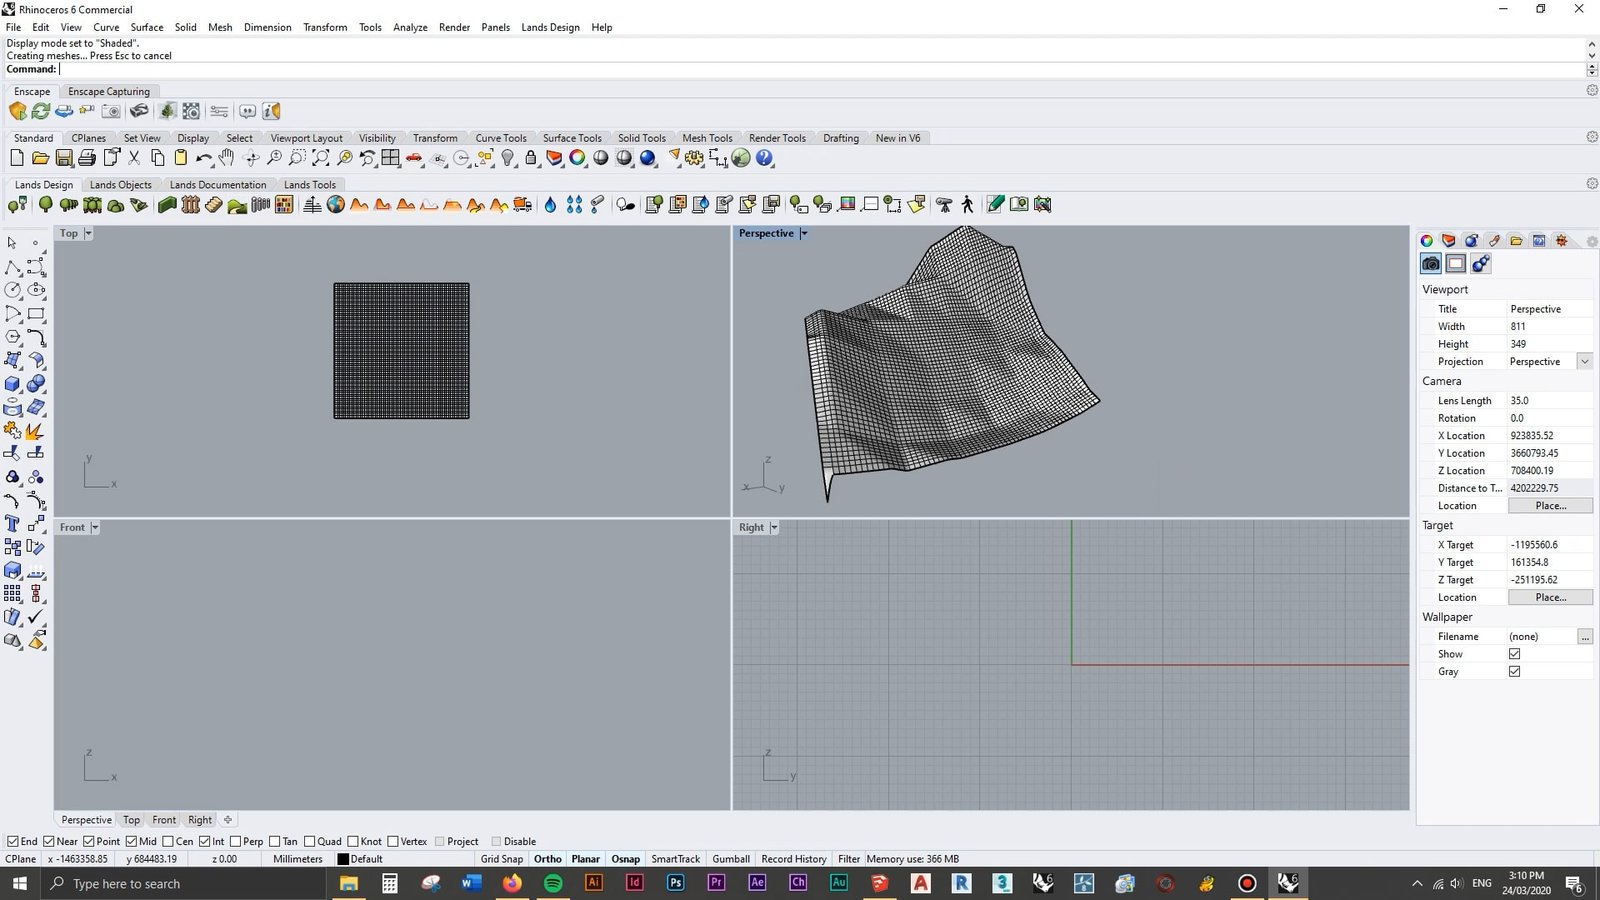
I will leave the rest up to you! How you want to materialize the terrain, annotate it or showcase it is completely up to your own creativity from here.
I hope you found this guide useful 🙂
DO YOU HAVE A QUESTION YOU WANT ANSWERED?
If you have a question you want answered or discussed, feel free to post it on the forums so I can see it!
The Best Community of Architecture Students
Other students might even join in on the discussion and answer it for you.
If not, I’ll answer it on the next Q&A episode of the podcast!
Resources Mentioned
Hang with us on the podcast: http://successfularchistudent.com/category/the-successful-archi-students-podcast/
Ask a question/join the community: http://successfularchistudent.com/community/get-help/
How to Model a 3D Site from Google Earth in Under 60 Seconds | 3D Topography Site Model Tutorial
If you prefer reading, this is the video transcript of the video “How to Model a 3D Site from Google Earth in Under 60 Seconds | 3D Topography Site Model Tutorial“
Kyle 0:02
Hey guys what’s going on, I just wanted to quickly make a video about creating topography or a site contour model from Google Earth. So it’s really super easy. We’re just going to use Rhino and SketchUp. And it will take us a couple of minutes, I’m going to show you exactly how to do that right now.
Kyle 0:22
So first things first, you want to open up SketchUp, I’m just using SketchUp Pro, you can use this on SketchUp. Make the free version if you want. So it’s really accessible to everybody. You want to start off by going to File geolocation and then go at location. And you want to just try and pick out the spot that you want to get the terrain for and get a contour model of. So I’m just gonna go here somewhere in Nepal, because there’s a bunch of hilly spots said I’m gonna select the region. I’m just going to import it. Now we’ve just imported our map of the site. And all we have to do is go to a file geolocation show terrain. Now as you can That’s pretty gnarly, but depends what site you’ve got, it might not be this big. However, from here, we can now import this into Rhino. And we’re just going to go export. Actually sorry, we’re just going to save this, we can just go save this as a SketchUp, eight version version of SketchUp. And we’re just going to go site for Rhino, we’re going to save that. Now moving back into Rhino, we can open up a new file, and we can file import. And we’re just going to find where we save that. So all of these should should be fine as default, however, make sure you’ve got it on as a mesh, and you want the edges and faces everything as well. So we’re just going to click OK. And we’re just going to place that model into a rhino file. Go ahead and delete this flat plane as well. So from here, what we can do is enter our top view, and we’re just going to scroll out and go find it. And what we can do now is just create a drape over this. So With it unselected, we can just type in drape. And we’re just going to create a square as it says drag a window over area to drape. And just put that over there. Going back to our perspective view, you can see that’s created a surface of the model. And we can go ahead and delete the group that’s underneath it. And we’ve now got a NURBS surface for that model. And if we go into a shaded view, you can see that it’s just molded out that side completely. And there’s it’s not perfect. This is actually really good considering that. The other way you have to do it is by getting a contour map, making sure it’s the right scale and everything and then scaling them up and doing spending a whole lot of time just drawing every single line on the contour map. So considering that this just took less than five minutes, it’s definitely a cool feature and it’s worth knowing for your architecture projects. So if you liked this video, be sure to like, subscribe and comment. It really does help out and Go check out some other videos if you’re new around here as well. Thank you guys and take care