
4 minute read
7 Drafting Tips for Architecture Students
I thought that since I’ll be giving away a drafting kit in a couple of days that it would be useful to give you 7 drafting tips for architecture students! (stick around until the end and I’ll show you how you can get even more entries for the contest)
I’m sure a lot of students have the same take on architectural drawing – it’s either your best friend or worst enemy. It can either be extremely sexy or mundanely boring. But, in reality, it’s a skill that will increase your hirability and usefulness in the office nonetheless.
So, with that said. What are the 7 biggest drafting tips for architecture students I can give to you, the enthusiastic Architecture student?
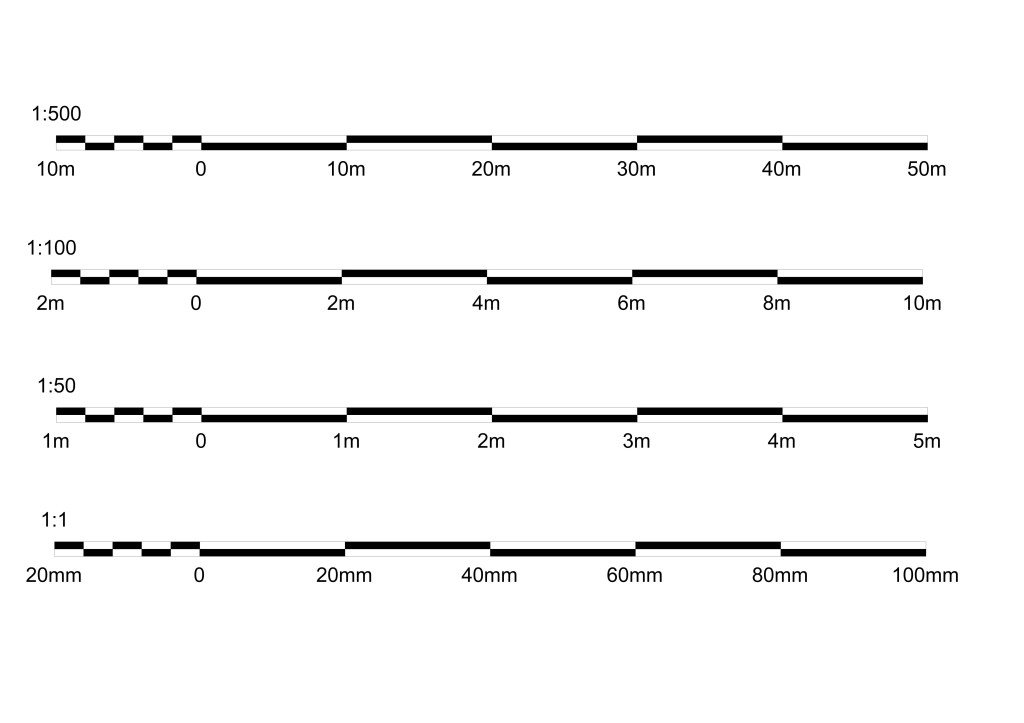
Drafting tips for Architecture Students #1.
The larger your scale is, the more detail you need to provide.
A 1:5 detail is a lot larger than 1:200. It means you are zooming in on whatever you are showing and therefore you need to show more detail.
Drafting tips for Architecture Students #2.
Let your drawings breathe.
Don’t over crowd your content. I talk a bit more about this in drafting tip #4. If you’ve correctly laid out your drawings then this shouldn’t be an issue.
It’s definitely something to consider though. The power of minimalism when drafting is extremely useful. The simpler something is, usually the clearer it is to understand.
That doesn’t mean to leave out important information such as construction details or conceptual “moments”, but it is a good idea to consider the use of negative space as a design aspect to your sheets.

Use “negative space” to keep your presentations clear and visually appealing. Minimalism is underrated and jurors love it!
Drafting tips for Architecture Students #3.
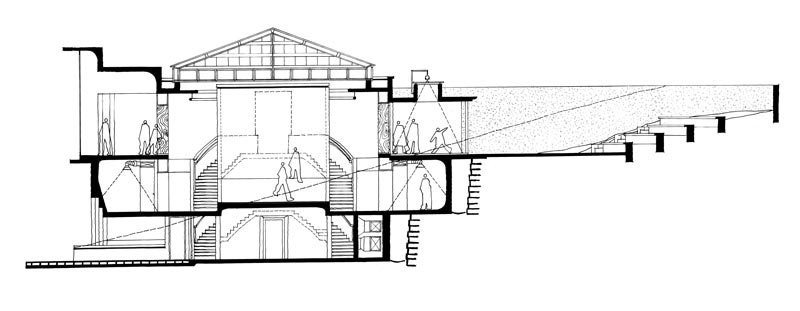
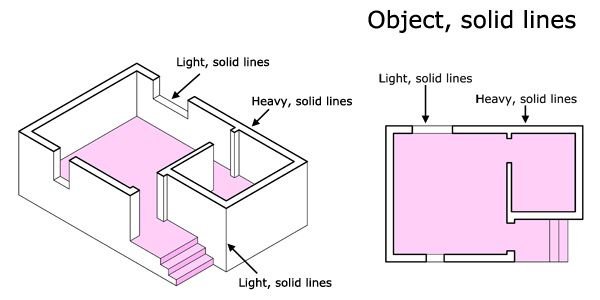
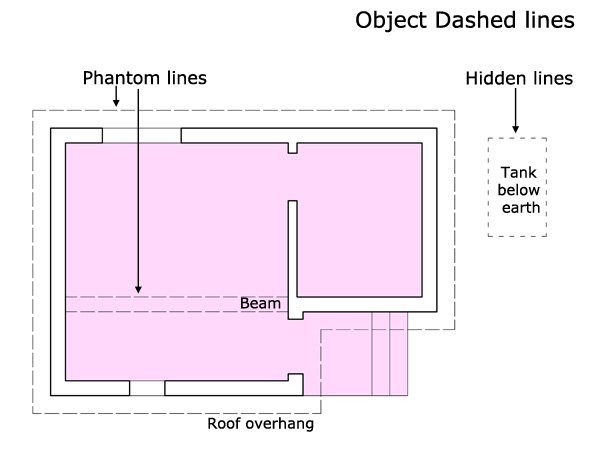
Use line weights to create hierarchy in your drawings.
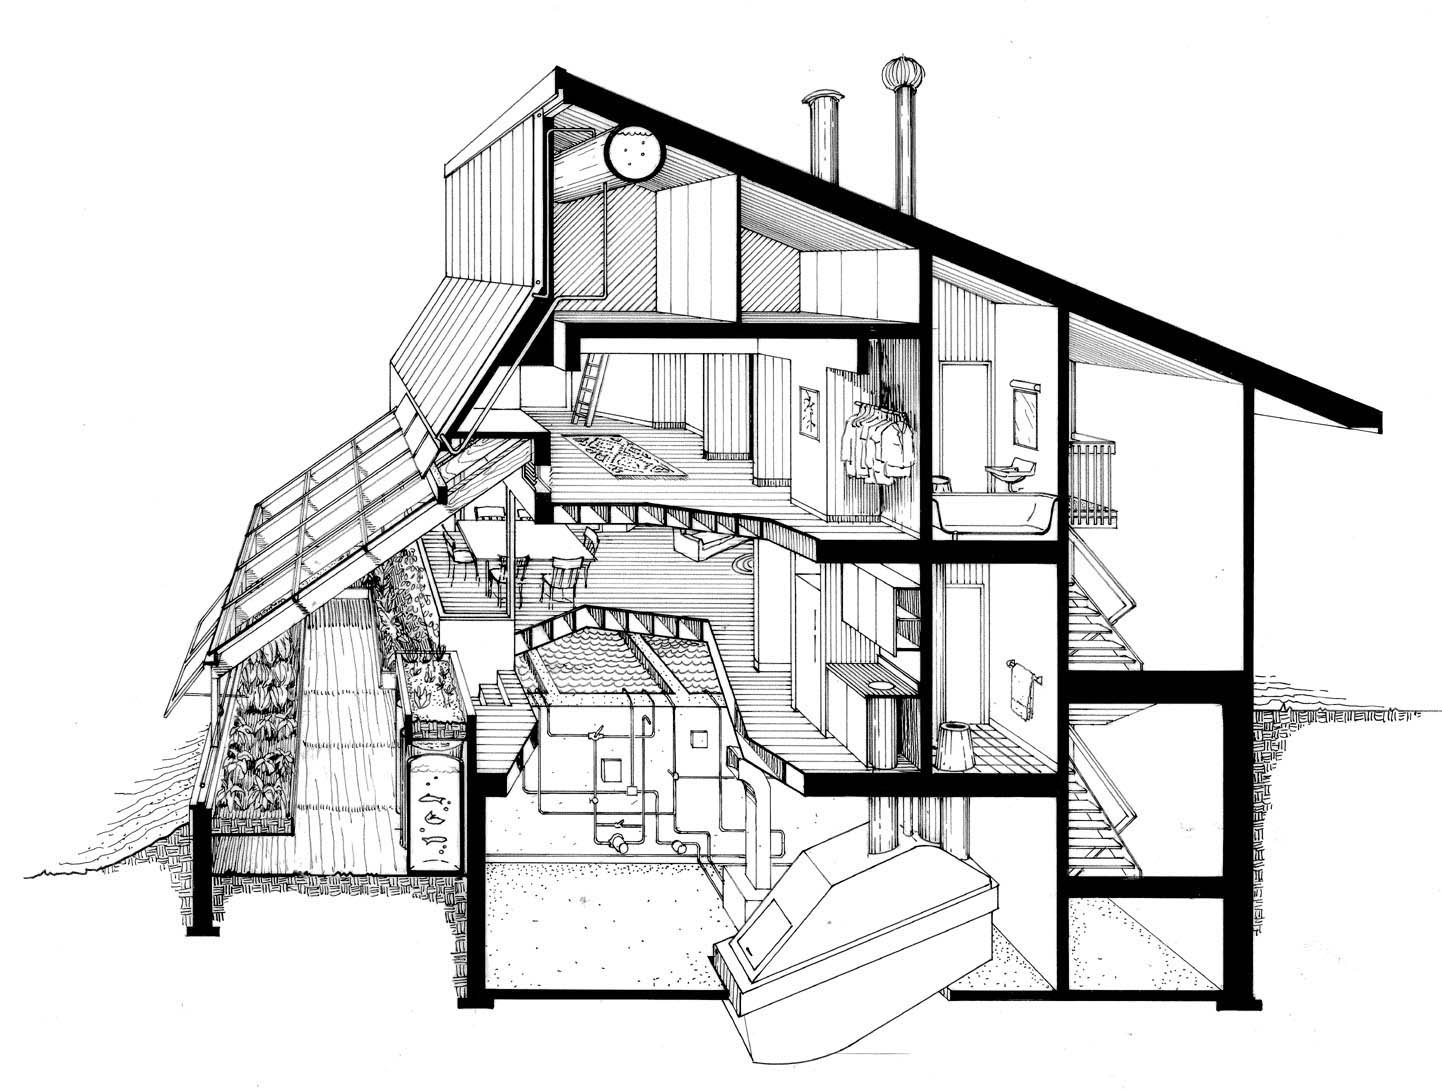
For a potential client or juror to understand your drawings, you need to use line hierarchy. Line hierarchy is the ability to change thicknesses of lines in your drawings to give the effect of something being closer or further away from the cut line.
For example, in a section, everything that the section line has cut through is closest to the point of view. Whereas everything behind the cut line gets further and further away in the drawings the further away it sits back in real life.
To represent this, you’d use your thickest pen on everything being cut through in the section cut. For things sitting further back, you’d use a lighter pen.
It’s important to use multiple pens of varying thicknesses, and, if you’re lucky enough to win the drafting kit, you’ll receive a set of 9 STA ink markers with thicknesses of 0.05mm through to 0.80 (+ a brush tip pen). Otherwise, it could be wise to invest in a set to improve the clarity, comprehension and clearness of your drawings!
Drafting tips for Architecture Students #4.
Plan out your sheets before drawing a singular line. Use a grid to give structure!
I’m sure we’ve all been roasted before for having a disorganised presentation sheet set. No? Just me?
Well, apparently, it’s quite common especially for fresh students to do all their drawings and renders and to slap them onto a sheet without any consideration as to how they are placed
Your lines might be perfectly drawn, and your penmanship might be impeccable, but if your work is all cramped and not thoughtfully laid out, then your entire sheet will look messy and your beautiful drawings will be irrelevant.
You can’t just “wing it” and lay out your sheets as you go. In fact, that’s probably just going to make you do a whole lot more work than necessary.
Saying that, I believe it’s a great idea to have a “shopping list” of the drawings you need. What I mean by this is to write out a list of drawings you want to represent your design concept and then design a sheet layout around this shopping list. Not only will this improve the look of your layout, but also save you time and help you understand what drawings you need to prioritise over others, and what scales they need to be to.
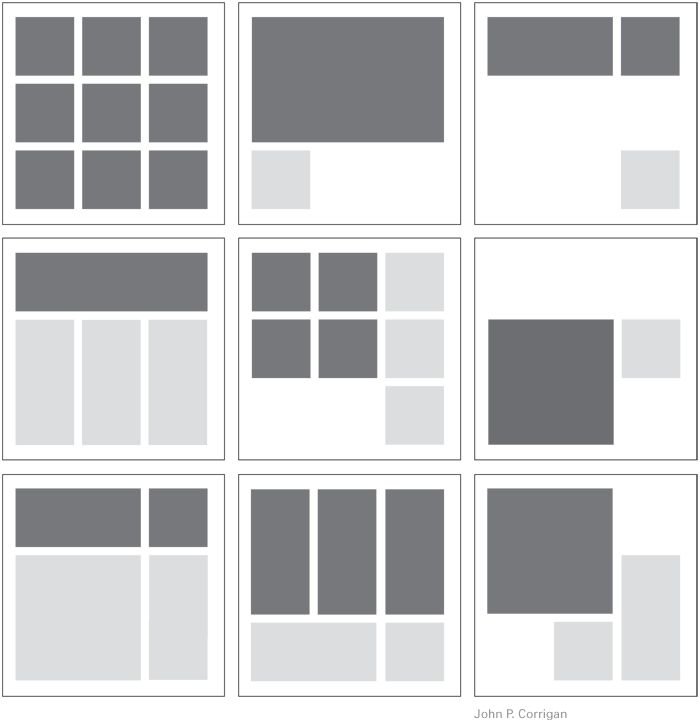
Use a light set of pencils to draft your sheets and lay it out using a grid. Consider the use of “negative space”, or space on the sheet where there are no drawings or text, just blank space, to help it “breath” and avoid it looking cramped.
Once you’ve laid out a grid and considered what drawings will go where, you’re ready to start drafting. Without taking this first step, your drawings will never look pristine or organised, resulting in lost marks or lost clients.
Drafting tips for Architecture Students #5.
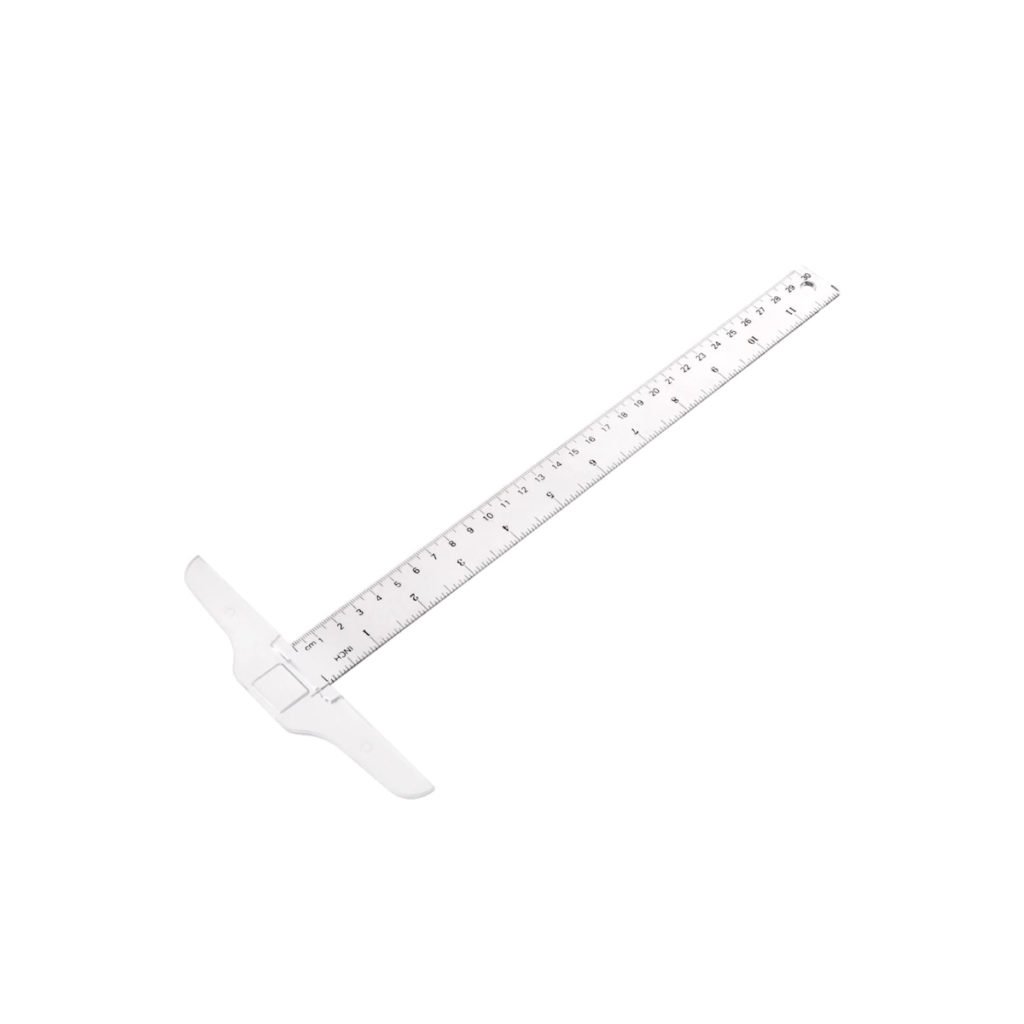
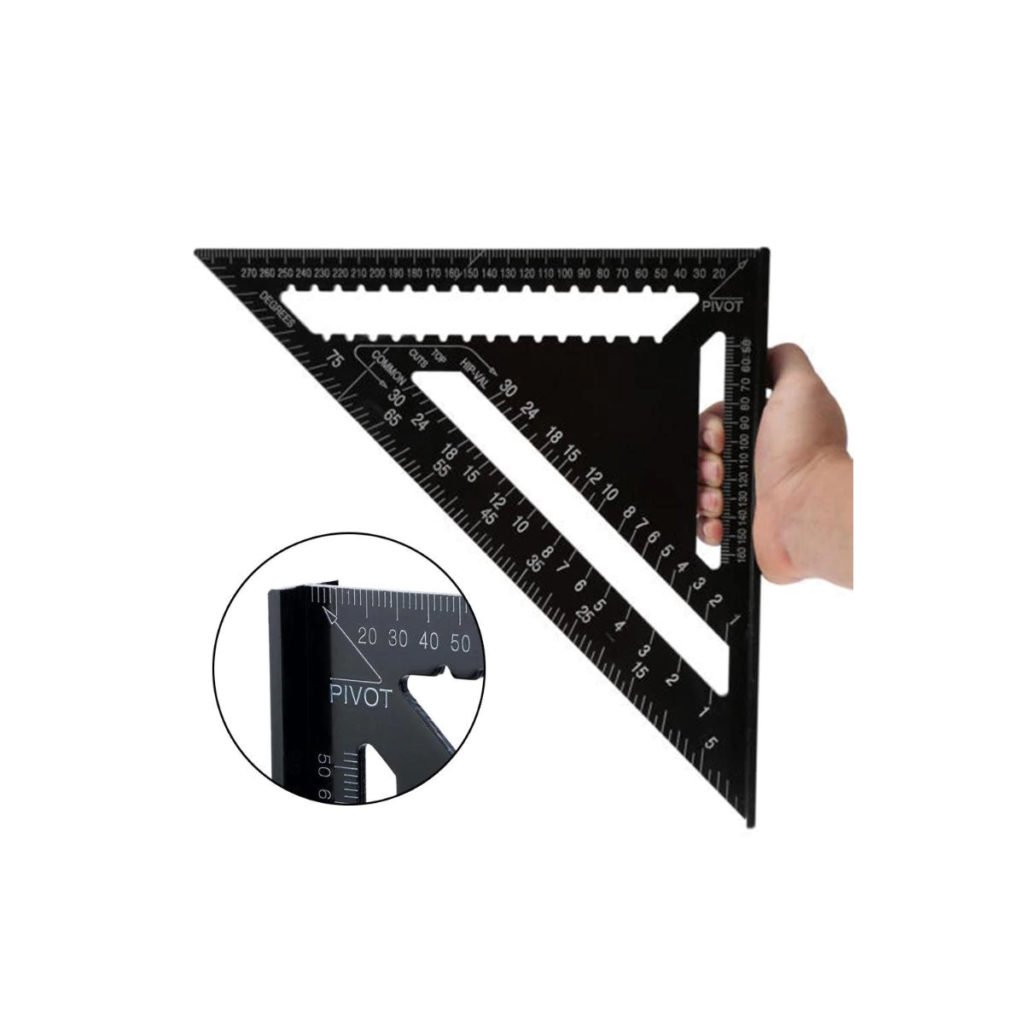
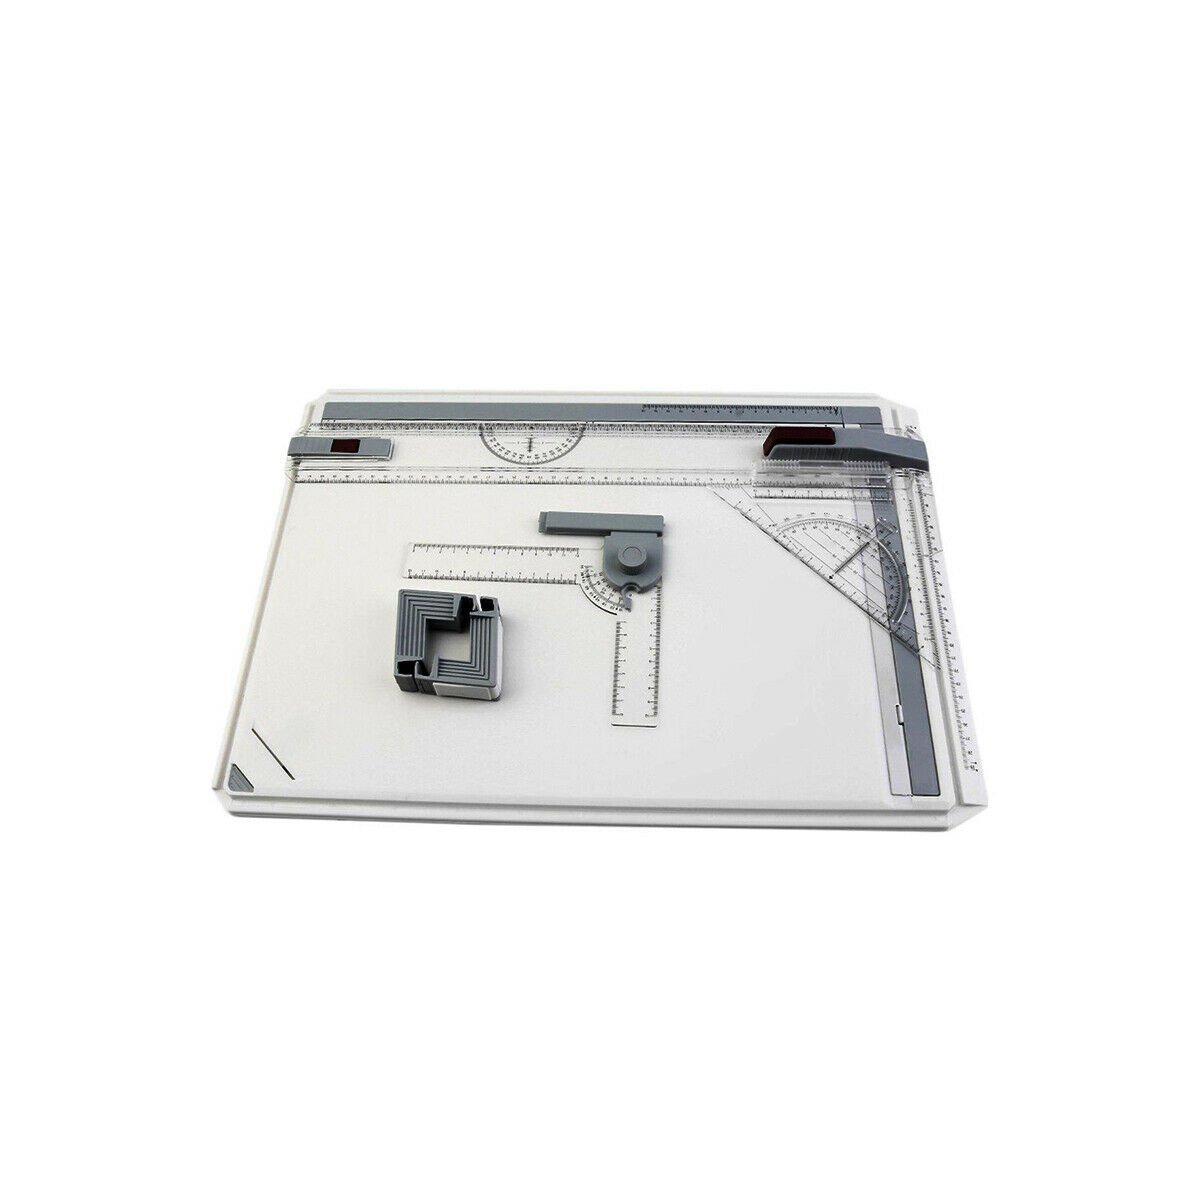
Use a drafting board and/or T-Square for horizontal lines – and Triangles for verticals.
If you win the drafting kit (fingers crossed), you’ll have your very own portable drafting board which makes drafting 100000x easier while producing cleaner drawings. Otherwise, it might be useful to invest in a T-Square or Drafting Triangle to improve the quality of your lines. Ideally though, an A3 drawing board or drafting table would be best.
Drafting tips for Architecture Students #6.
Keep your lettering clear and readable.
It’s more important that your text is actually readable then it is looking artistic and fancy. Architectural lettering is a thing of it’s own and requires practice.
For starters, it’s a good idea to use guidelines for your text and to use a drawing board or T-Square for horizontal lines to ensure your writing isn’t wonky.
This ensures your text not only looks good, but is eligible and easy to read.
Drafting tips for Architecture Students #7.
Practice makes perfect.
Some things in life just take time, and drafting is no different. If you want highly appealing drawings, it takes practice and time to perfect it.
Saying that, as a student you don’t need to aim for perfection. You simply need to be getting better and better by practicing and pushing yourself outside of your comfort zone by trying new things.
I sincerely hope this has been helpful and if you have any concerns or questions please don’t hestitate to contact me.
Your Biggest Fan,

Kyle Sinko, Founder of Successful Archi Student // Architecture Student from South Australia
Download your free Success Checklist
