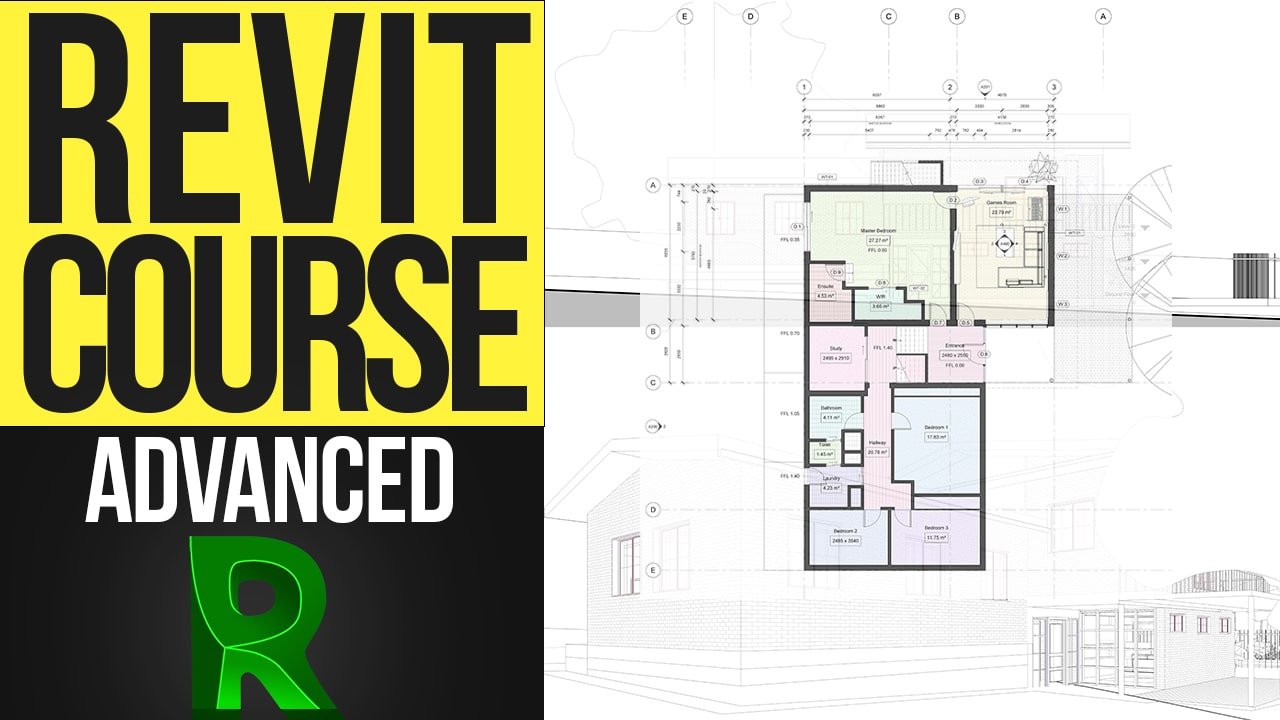
Revit Advanced Course – Tutorials to Learn Revit Fast
About Course
After completion of the Beginner and Intermediate Revit Course, you’re ready to master the industry’s leading 3D software, Revit.
Let’s face it. Learning software is often complicated and difficult. Doing it by yourself makes it even harder! It doesn’t need to be that way. In this course, you will be learning from a Master of Architecture student who has practical Revit experience across four architectural firms (which all use Revit as the primary design and documentation tool). You will be able to follow along to learn the skills and confidence you need to use the software efficiently in a professional setting.
You can spend months learning Revit by yourself, and not necessarily learning it the right way. In Kyle’s 20-hour course, you can fast-track that journey to gain the skills to design and model in Revit at a professional level.
Most online Revit tutorials or courses are boring, slow going and demonstrate incorrect practices. If you’ve watched Kyle’s videos before, you’d know that these Revit tutorials are fun, fast and easy to follow.
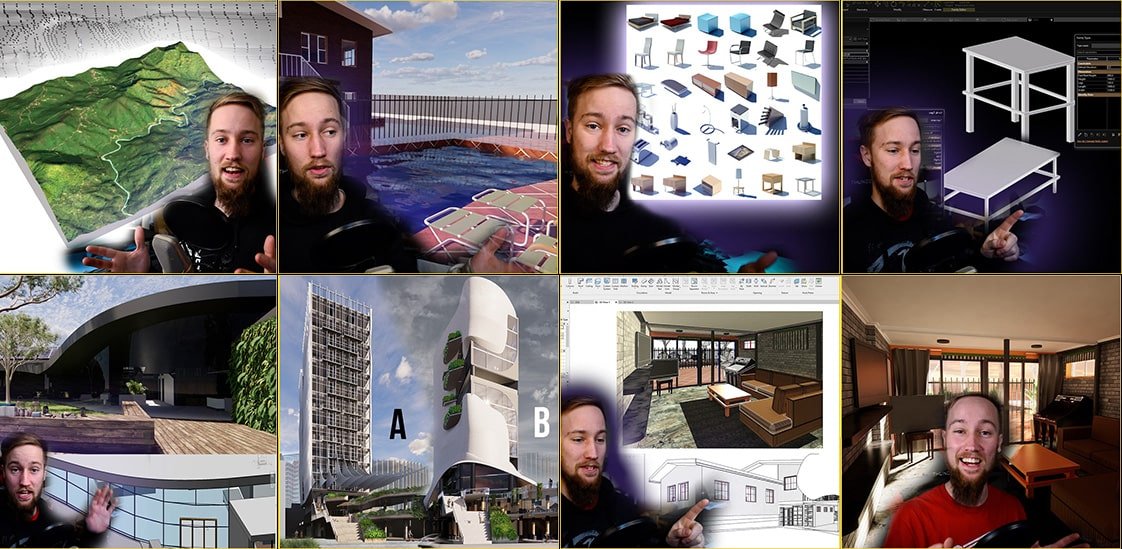
What Will You Learn?
- You'll upgrade your skills to design and model confidently in Revit.
- You'll improve your overall skills and knowledge of 3D modelling, architecture and design.
- You'll master project organisation, annotation and stylisation in Revit to have complete control over your drawings and project.
- You'll learn how to use sheets and create custom titleblocks.
- You'll learn how to print/plot your drawings in Revit
- You'll learn how to use project parameters to organise your project browser and sheets.
- You'll master using tags and labels to utilise the "Information" in the model (BIM: Building INFORMATION Modelling).
- You'll learn how to use both project and shared parameters.
- You'll learn how to dimension in Revit with the best practices.
- You'll learn how to use both category and keynote tags and schedule them on your drawings.
- You'll learn how to use legend components to isolate elements in your model to dimension.
- You'll learn how to create an isolated 3D view of an element and dimension 3D views,
- You'll learn how to create visual hatch/finish legend.
- You'll create a view and sheet list, room/area schedule and basic door and window schedule.
- Then, you'll learn how to create a custom, smart and visually pleasing door and window schedule that incorporates tags, labels, project parameters and shared parameters.
- You'll learn how to manipulate phasing to isolate elements in a pre-existing phase.
- You'll create new views such as internal elevations, a "part" detail plan and axonometric section.
- You'll master view templates to keep your views consistent and graphically stylised.
- You'll learn how to edit system families.
- You'll learn how to create intelligent details in Revit using detail and repeating detail components, smart tags, modelling detail elements, adjusting and adding linework and profiles, adding insulation and timber elements.
- You'll learn how to use view filters to adjust the graphics of a view.
Course Content
Course Files
Download all the relevant and bonus course materials here.
-
Download
00:00
Part 1 – Project Organisation
Placing views on sheets, loading and editing a titleblock, printing/plotting in Revit, neatening the project and adding a project parameter that will help organise your sheets in the project browser.
-
Deleting and Creating Views
01:23 -
Importing and Editing the Titleblock
02:38 -
Placing Plans on Sheets + Organising Drawing Numbers
07:15 -
Exporting Your Drawings to PDF
08:21 -
Guide Grids
03:26 -
Elevations on Sheets
05:21 -
3D Views on Sheets
03:18 -
Sheet / Project Browser Organisation
08:10
Part 2 – Annotation
Creating grids, elevation and section markers, rooms and an introduction to using and editing tags. Using project parameters and labels to create a custom room tag. Dimensioning in Revit and the best practices.
-
Grid Lines
10:47 -
Rooms, Room Tags and Room Separation Lines
04:49 -
Introduction to Tags and Labels
01:24 -
Learning How Tags Work
01:52 -
Custom Room Tag & Using Calculated Parameters
04:22 -
Prefix to Label & Renaming Parameters and Family Types
03:52 -
Fixing the Text Border
01:25 -
Creating a Label and Adding a Visibility Parameter
01:26 -
Change a Parameter’s Group
00:22 -
Instance vs Type Based Parameters
00:59 -
Colour Fill / Room Legend
01:18 -
Adding Rooms to Level 1
00:52 -
Room Bounding Walls
00:45 -
Adding Rooms to Level 2
01:17 -
Dimensioning Overview
08:06 -
Dimensioning the Ground Floor Plan
08:11 -
“Fudge” a Dimension
02:13 -
Deleting a Single Dimension
01:06 -
Line Styles
02:40 -
Line Weights and Patterns
02:45 -
Fill Patterns and Arrowheads
01:47
Part 3 – Category Tags
Understand the importance of tags by placing door and window numbers.
-
Why Use Tags
01:49 -
Placing and Numbering Door Tags
02:14 -
Editing a Door Tag
01:00 -
Placing Window Tags
01:00 -
Editing Door and Window Tags
01:43
Part 4 – Keynote Tags
Understand keynote tags, set up a keynote file and link it to your project, add items to the keynote schedule, tag items in your project with keynote tags, add keynote legend to all your sheets.
-
Keynotes Introduction
02:10 -
Setting up a Keynote File
00:56 -
Editing the Keynote File and Adding Keynotes
01:50 -
Tagging With Keynotes
02:56 -
Keynote Legends
06:40 -
Keynote Uses and Examples
04:04
Part 5 – Legends
Understand what legends are and their uses, create legend components, dimension legend components, create an isolated 3D view of an element, dimension in 3D views and create a visual hatch/finish legend. Includes a more detailed breakdown of how tags work.
-
Legend Introduction and Examples
01:13 -
Legend Components
04:37 -
Isolated 3D View
03:46 -
Dimensioning in 3D
01:07 -
Tagging the Family with a Keynote
01:52 -
Hatch Legend
03:50 -
Tagging Materials
04:35
Part 6 – Schedules
Learn how schedules work and what their possibilities are. Create a view and sheet list, create a room/area schedule, create a door/window schedule.
Then, learn how to create a custom, smart, visually pleasing door and window schedule that incorporates tags, labels, project parameters, shared parameters. Learn how to manipulate phasing to isolate elements in a pre-existing phase.
-
Sheet List & View List
07:48 -
Room/Area Schedule
01:35 -
Door and Window Schedules
04:17 -
Sexy Door and Window Schedules Introduction
07:16 -
Create Pre-Existing Phase
02:07 -
Isolate with Pre-Existing Phase
08:12 -
Creating New Door and Window Tag and Adding Parameters
09:15 -
Shared Parameters
12:55 -
Stylising the New Door and Window Tags
13:18
Part 7 – Extra Views
Create new views such as internal elevations, a "part" detail plan, axonometric section. Also, learn how to use View Templates to keep your views consistent and graphically stylised.
-
Detail Plans, Internal Elevations and 3D Sections Introduction
03:03 -
Internal Elevations
07:06 -
View Templates
07:40 -
Detail “Part” Plan
06:09 -
3D Section
04:12
Part 8 – Graphic Stylisation
Manipulate view range, adjust markers, change graphic override settings, add an underlay/overlay, adjust linework, edit system families and add custom spot elevations.
-
Stylising the Drawing Introduction
00:55 -
Fixing the View Range
04:35 -
Adjusting Section Markers
02:12 -
Override Wall Colour
02:16 -
Moving Grid and Elevation Markers
01:12 -
Floor Hatches
05:24 -
Duplicate View Settings
01:02 -
Underlay
01:17 -
Linework Tool
02:02 -
Tag All
01:08 -
Halftone
02:24 -
Spot Elevation
01:36 -
Editing System Families / Custom Spot Elevation
08:21 -
Elevations
05:14
Part 9 – Smart Detailing
Learn how to create intelligent details in Revit using detail and repeating detail components, smart tags, modelling detail elements, adjusting and adding linework and profiles, adding insulation and timber elements and finally learn how to use view filters to adjust the graphics of a view.
-
Smart Detailing – Introduction
07:41 -
About Detail Components
00:59 -
Creating a Detail Callout
01:01 -
Step 1 – Simplify the Drawing
02:41 -
Step 2 – Changing Element Structures
03:30 -
Step 3 – Model Everything You Can
05:48 -
Step 4 – Adjusting Linework
01:37 -
Step 5 – Adding Detail Components
02:16 -
Repeating Detail Components
01:40 -
Creating a Parametric Detail Component
07:40 -
Cut Profile
02:34 -
Insulation
02:28 -
Roof Sheet Profile
01:31 -
Roof Battens
01:23 -
Annotating with Tags
03:52 -
View Filters
06:26 -
Tagging Parts of Elements (Material Keynote Tag)
02:50
Bonus Tips
20 bonus tips and tricks I wish I knew when I first started using Revit
-
20 Bonus Tips and Tricks
19:26
Review
-
How was it?